Tuesday, September 27, 2016

Planting Peonies


Tuesday, September 27, 2016

A foggy morning here at the flower farm. Traffic on Route 2 is picking up as people head more west than east to work for the day. An Army convoy is heading east and it looks like the one I saw last week with chalk-marked numbers on the doors that commenced with ME---for Maine I surmise.

Last night's rain was enough to dampen the ground but the 1/10th inch did little more. I'm heading back  into the lower daylily garden today to dig more plants for Gail to pot up for next year's sales. She has a few more peonies to plant this morning and that will be it on them. Peonies are a great flower and one which often seems to be misunderstood.


Peonies have been around for thousands of years and they come with a list of misinformation. People seem to have been taught that they can only be planted in the fall, that they have to be planted deep, that they must have ants on them to ever flower---the list goes on and on. Peonies are easy to grow if you just remember a few things.


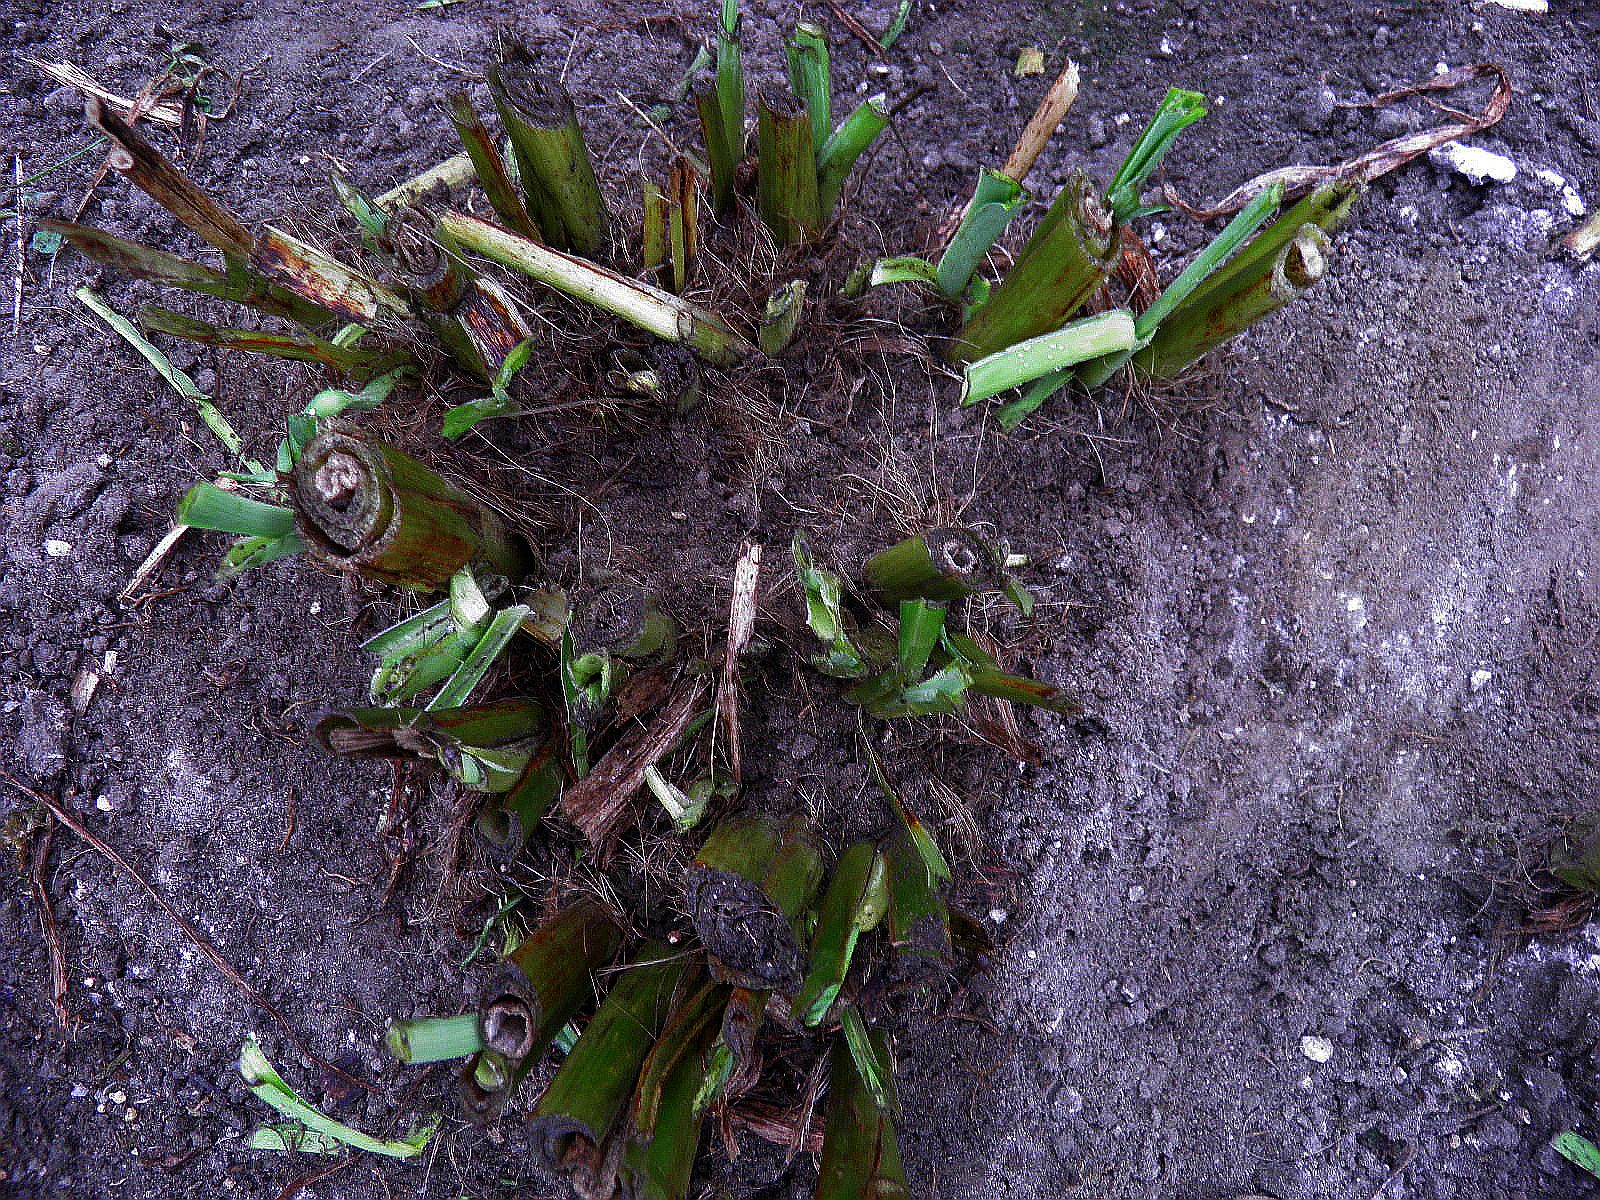
Peppermint--See thin red stripes?


Peonies grow from a thick root such as the ones pictured here. These are three year old roots from a wonderfully fragrant, pink peony named Dr. Alexander Fleming. (Dr Fleming discovered penicillin). Look closely and you will see the pink and white eyes. These will become the stems from which the flowers grow. In the commercial production of peony roots for sale, the plants are dug and divided every three years so that the roots at that time can easily be divided to this size with each root containing 3-5 eyes per root.


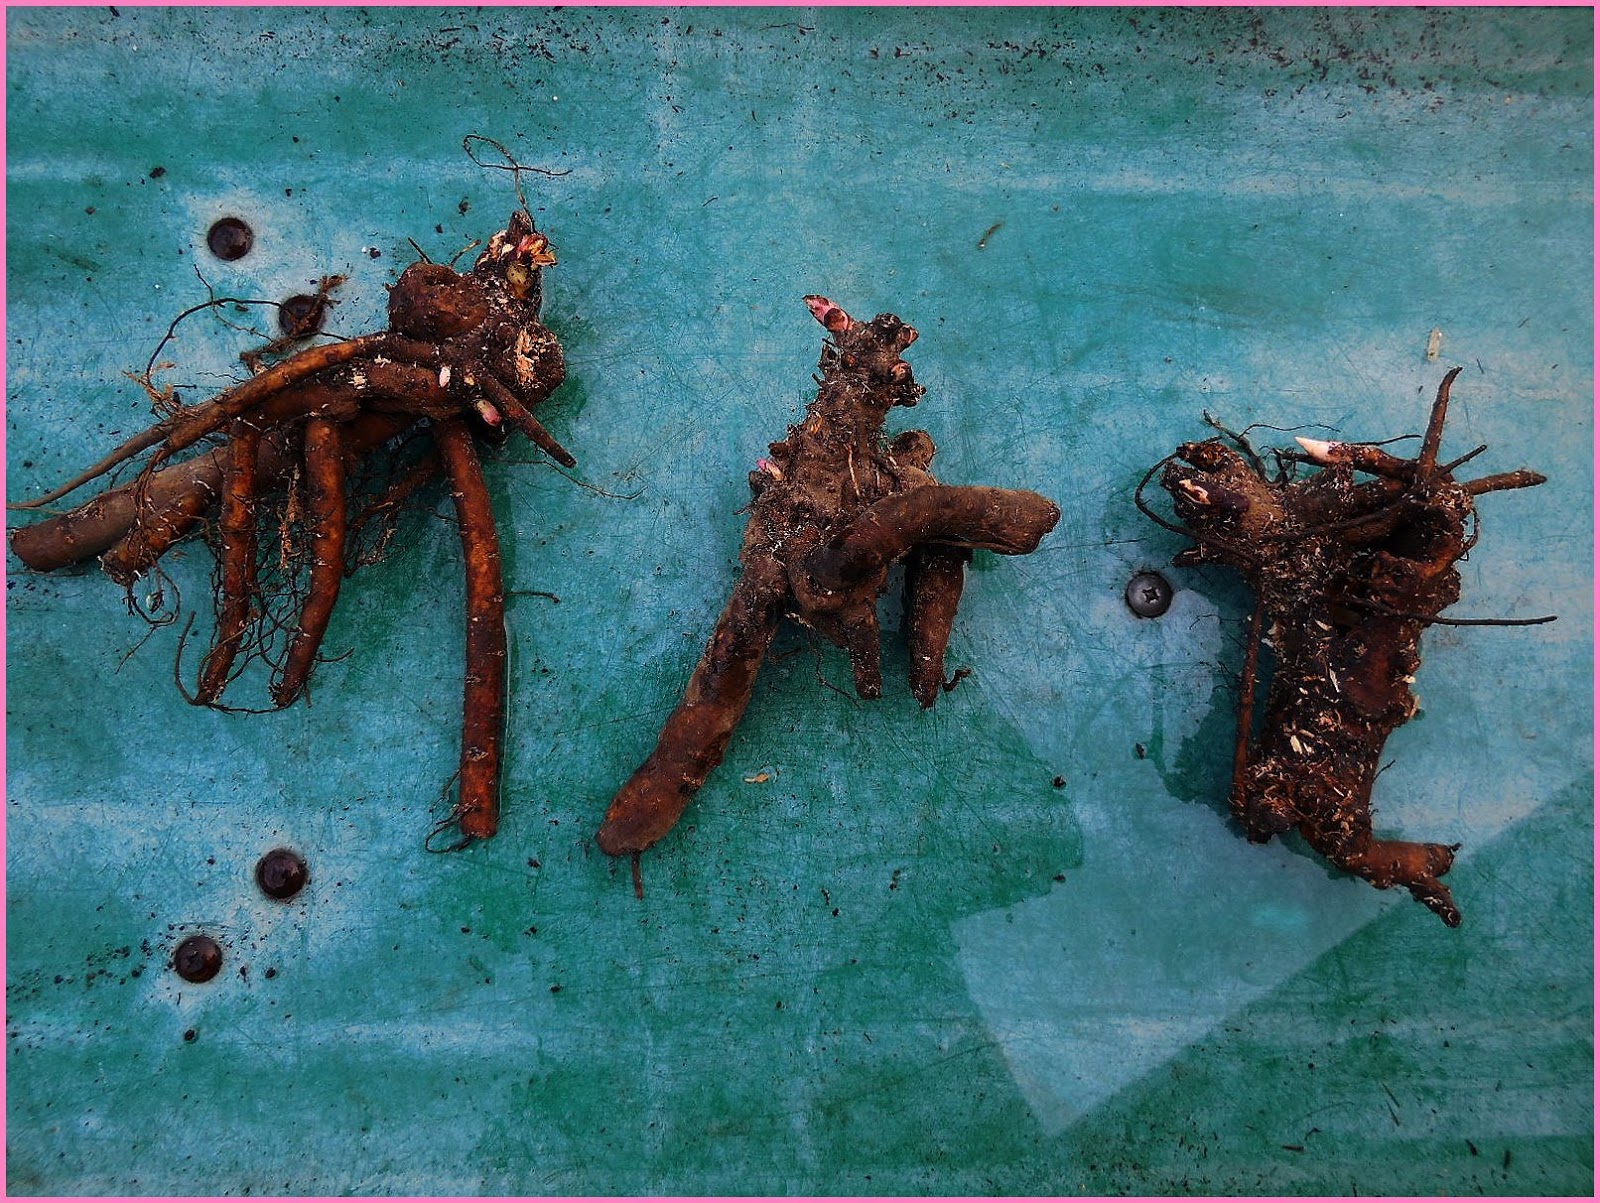
Peonies should be planted in full sun in well-amended soil in a dry location where springtime water is not a problem. The most important planting fact is that peony roots should never be planted deeper than 2". When I explain this to customers I use the "two digit rule" The top of the peony root should be no more than 2 finger digits below the surface.   With roots such as those pictured, find the eyes and adjust the root so the eyes are growing upward. When planting potted peonies, check the depth inside the pot with your finger. Press a finger down alongside a stem, checking for a root depth of 2 finger digits.
In garden settings, peonies sometimes become covered by grass clippings or leaves and other debris blown into the garden. Every few years check to see that the roots have not been covered deeply as long term that will have an impact on root bud production and the number of flowers you can enjoy.

In New England, peonies set buds for next year's flowers in mid August--a time known for hot, dry temperatures. If it's dry in your area then, water you peonies well. You'll notice increased production the following year.

We wish peonies would bloom all season long but they do not. By mid-July, the flowers have bloomed and all we have left until next year are leafy green plants, pictures and memories. You can extend your enjoyment by about 30 days if you cut peony stems when the buds are tight and just showing some color. If you simply lay cut peonies in the bottom of your refrigerator, they will keep surprisingly well. Take them out, trim the bottom off the stems a couple inches and put them in a vase with water. In a couple days, you'll be asking "Why didn't anyone ever tell me that before?"

In recent years, peonies have become a very important floral crop in Alaska. That's because the season there begins later than it does in the east. Having peonies available for the cut flower trade in August and September meets a growing demand. We wish ours would last that long in our gardens!

Have other peony questions? Want to know which peonies we have potted for sale? Give us a call at 802-426-3506 though Columbus Day or at 802-426-3505 year round. Peonies are special to us and we are sure they will be to you too!

Writing from the flower farm this morning where the fog has risen above the road but still holds tight along the river. A beautiful day is in the making!

George Africa
The Vermont Gardener
On Facebook as Vermont Flower Farm & Gardens and also as George Africa
On Twitter as vtflowerfarm

Always here to help you grow your green thumb!


Thursday, September 15, 2016

The Last Day of Summer 2016


Thursday, September 15, 2016


38.2° this morning on the mountain above Peacham Pond. Windless and quiet, save for Karl the Wonder Dog stretched out on the floor next to me....... snoring loudly and apparently dreaming too as he occasionally twitches a leg and lets out an indiscernible line of dog-talk. Good dog, Karl, good dog!

As we approach the end of summer a week from today, things have changed a great deal since I took this picture from the daylily display garden. The summer has been dry with many +80° days and too many 90° days for Gail and Alex to tolerate. The adjacent Winooski River is at late October level, and many folks are already lugging water after their water sources have dried up.

The tall hollyhocks in the picture have long since faded and round seed pods have formed but with rather limited seeds because of the extended heat. The daylilies are down to a dozen or so that are late bloomers. Autumn Gold, Autumn Minaret, Autumn Prince, Surprisingly Late, Olallie Mack, Olallie Keith, Ocean Swells, Ovation, Challenger, Butterscotch Harvest, Shocker, Yellow Sights, Sandra Elizabeth, plus another dozen that rebloom depending on weather conditions and sunlight.

I estimate that the flower production this summer was off by 25% because of the drought. Right now we are digging and dividing daylilies for next season and the soil is like powder and falls from the root clumps as I pull them from the ground. We need water badly but don't ever want to see a repeat of five years ago when two spring storms brought ten feet of water flowing over the gardens and then in late August did the same thing again as Tropical Storm Irene came to visit.

Despite the end of summer, it's a great time to get into the gardens with your camera and take a bunch of pictures to help you plan new gardens and give thought to redesigning older ones. Pictures make the task easier, especially when the snow is deep before you begin to think that new or upgraded gardens are a good idea. Save the photos on a smart card or put them in a separate folder on your computer so you can find them easily. All summer long not a day goes by without a gardener wanting to find pictures on their phone to show me and ask questions. I hate to think how long I stand there waiting for them to find the pictures. Use a smart card or computer folder with a name you can remember--it makes sense.

Along with the images, make some notes that will help with the design. Take critical measurements, note the current size of trees and shrubs and distances from your home or out-buildings. I make simple black and white copies on my printer and take them with me back to the gardens when I am taking measurements. Simple notes will be helpful a couple months from now. "Lemony Lace Sambucus--42 inches tall", "remove the Tiger Eye Sumac", "add more Helenium Salsa", "divide Strutters Ball and Bama Music", "68 inches from dwarf spruce to garage rain gutter". The planning process will be a great deal easier when you have reminders & real dimensions versus your best guesses.

So as temperatures decline, give some time to what you learned from your gardens this summer and want to change for next year. It's fun, it's easy. And if you run into a snag, always remember--"We're always here to help you grow your green thumb!"


Writing from the mountain above Peacham Pond where I hear a loon calling...but without receiving an answer.


George Africa
The Vermont Gardener
Writing on Facebook as George Africa and also as a Like Page, Vermont Flower Farm and Gardens
On Twitter as vtflowerfarm


Wednesday, August 31, 2016

CUTTING BACK DAYLILIES


WEDNESDAY, AUGUST 31, 2016

62.1°, dark sky and pouring rain this morning. I just returned from riding the perimeter in the cart to check fences and make sure the critters of the forest didn't stop by for a meal last night. The various plants can't possibly be as tasty as they were a couple weeks ago but the well-mowed grass in between all the gardens grows quickly and might be enticing.

During the past week, I have received three phone calls asking if it is too early to trim back daylilies. It's been so dry this season that no daylilies look the way we wish they would. Now is the time that the late bloomers typically provide nice color when other flowers bloomed extra early or stopped blooming because of the heat. Yes, the late bloomers are blooming but their foliage shows the stress caused by those multiple 90° days.

Here at the flower farm, we begin trimming back the daylilies now for a couple reasons. We try to get through as many rows as possible to trim back the foliage and spent flower scapes, and pull out the debris at the base of the clumps. This reduces the possible carry-over of fungal issues or insects from this year to the next. We trim to 3"-4" above the ground and after the clean up I try to spray everything with horticultural oil. That oil is the one used by orchardists in the spring to suffocate insects and insect eggs that might be hiding on the bark of the fruit trees such as apples, pears, plums and cherries. It's commonly used and is easy to apply. I use about a third of what is recommended mixed with water with a squirt of dish detergent added to serve as a sticker. That helps the oil hold onto the plant better. As I spray I try to be sure to direct the spray to the spent scapes which once cut are hollow inside and can become hiding places for insects. Hort oil is available at agricultural or hardware type stores, is not toxic and is worth the effort.


Trimming back the foliage makes digging and dividing the daylilies that much easier. They weigh less and you are less likely to get a scape in the eye when you bend over to pick up a clump. The absence of leaves makes it easier to see how the plant has been growing and where to make your divisions based upon how you will use the plant once it is divided. We pot up several fans in gallon and six quart pots for the following year and line the rest out in rows to keep our stock going. Depending upon popularity, Gail plants multiple plants in 3 and also 5 gallon pots for gardeners who want a better deal on a special plant or who want bigger garden impact with a large clump. The big pots also provide a dramatic presentation at the front of our parking area and their visibility from Route 2 draws people in.

So to answer the question "Is it too early to trim back my daylilies now?" ......no, it's not too early. If you have some time, get trimming!

Writing from the flower farm where the rain is falling heavily and although I have plenty of outside chores I'm not in the mood to get wet. Stop by!

George Africa
The Vermont Gardener
On Facebook as Vermont Flower Farm & Gardens and also as George Africa
On Twitter as vtflowerfarm

And always here to help you grow your green thumb!


Tuesday, August 23, 2016

Dividing Daylilies


Tuesday, August 23, 2016

44.5°,  windless, sky full of stars, waning gibbous moon at 69%, quiet. Just back in with Karl the Wonder Dog. It's too early to be awake but I heard something at the back door and have been up ever since. The bears are arriving too often to eat the ripening black berries outside my office window and one of them has a bad habit of coming to the door. My guess is that he has been successful at some other house on his tour. We have taken to locking the storm door at night but this added challenge apparently is irritating the visitor a bit.

Daylilies--we love 'em-- but there comes a time when they need dividing. Here at the flower farm our motivation is to constantly have the right number for sales and that means dividing some both spring and fall. As visitor numbers decrease now compared to when the daylilies are peaking, it gives us time to begin to dig and divide. Some folks are hesitant to do this but if your clumps  are overgrowing your original garden design or if you notice a decrease in the number of scapes per plant or if there are almost no scapes in the middle of your clumps,  then it's time to thinking about dividing them.

The whole digging and dividing thing is real work so consider some stretching first to limber up before the digging, bending and lifting begin. We use shovels or spade forks and often add a 6 foot pry bar to the tool mix. I hear there is a new daylily separator tool on the market that works quite well. Here at the flower farm we have clay soil in many places and I have been reluctant to spend the money to try the tool knowing how difficult the clay is to dig. 


 I like to divide daylilies after a good rain when the soil is looser and the process goes quicker. I dig 8"-10" away from the base of the plant, circling the entire plant before using the shovel or fork to pry the plant out. If it is a large clump, I resort to a pry bar as the opportunity for more leverage makes the task easier.


Once the clump is out of the ground, I use a garden hose and high pressure to wash it clean of dirt. Then I move it to a cutting table. We do hundreds and hundreds of divisions so we consider ergonomics and have purchased a cutting table that has a sink and is at our standing height. Friend Gail T found an old metal wash sink from a farm milk house and aside from a need for a little more leg height and a cutting board on one end, that works great and can handle more daylilies in the sink sections. I stress ergonomics because I have never known a gardener who didn't get older. 


Last week I replaced all my cutting knives as our dig and divide season is starting. I go to Wally World and buy a bunch of their large, serrated meat knives at 88 cents each. Yes, it is a disposable world, but these work well for a season, rust over time, but hold the edge, unlike the regular cutting knives which dull in minutes.


The size of the divisions depends upon what you're looking for. A large clump that measures 30" in diameter can be split in half with one piece returned to its orginal location and the other half moved to a different garden, shared with a friend or divided into pieces. I try to make each division three fans whether it's going back into the garden to grow again or if the divisions are going into pots for sale. If I happen to have a daylily that is in short supply and difficult to find on the market, I might divide down to single fans and line them out in the garden in a trench well amended with compost and fertilizers to bring the production up as quickly as possible. Daylilies are like people--they grow up differently--and until you learn their nature, you don't know how long it will take for your new divisions to reach saleable size if you start with single fans. 

Here is a picture of three large divisions I made from a three year old clump of Alabama Jubilee. Any one of these will probably produce 4-6 scapes next season and in three-four years will be bushel basket size. Give it a try yourself!


Writing from the mountain above Peacham Pond where daybreak is still some time away as the days of me being in the garden by 4:30 have passed until next May. Happy gardening!!

George Africa
The Vermont Gardener
Vermont Flower Farm
On Facebook writing as George Africa and on a Like Page Vermont Flower Farm and Gardens. 
On Twitter as vtflowerfarm
Writing on many social media garden sites too

Always here to help you grow your green thumb!

Monday, June 27, 2016

Hostas: Slugs and Snails

 Monday, June 27, 2016

A clear morning here on the mountain as I pack the truck to head to the flower farm for the day. Crows are talking loudly at the compost pile, fighting over parings from a cantaloupe. The sky is clear, the morning without wind. This is the best part of today because the weather folks tell us to expect high humidity and temperatures in the 90s later on. 

The dry temperature has brought on weevils in the hostas. These tiny black and brown insects make the bazillion little holes that bother us to see in some hosta leaves. There's not much we can do about them save for chemical treatments which most of us avoid.

This time of year we typically see increasing numbers of slugs and snails but the numbers have been down because it has been so dry. This afternoon we are to expect thunderstorms and tomorrow heavy rains are supposed to approach. With these changes, we may see more slugs and snails in the hosta plants.


Many years ago I read some research from Hawaii where the Department of Agriculture was on a mission to quiet a noisy tree frog that disrupted tourists sleep patterns. One of the outcomes of the research was finding that caffeine kills slugs and snails and that hosta growers could use coffee to not only improve the organic content of their garden soils but eliminate pesky slugs that added unsightly holes to hosta leaves. As soon as I read the research I told all my hosta friends and I also started taking the coffee grounds directly to hosta gardens instead of the compost pile. I'll always remember starting with the hosta Invincible because its thin, shiny green leaves always seemed to be a magnet for slugs. The great news was that it worked!

So if you drink coffee or know friends or shop owners who will part with coffee grounds, move them to your hostas--the grounds, not the friends. Encircle each plant and smile for a change. Hostas without holes in July and August are just plain nice!!

Writing from the mountain above Peacham Pond where the cool morning is nice but I have to get to work in the valley. Come visit us!

George Africa
The Vermont Gardener
Vermont Flower Farm
On Facebook as Vermont Flower Farm and Gardens and also as George Africa, a FB page with lots of flower pictures.
On Twitter as vtflowerfarm
Writing on various gardening-related sites

And always here to help you grow your green thumb!